
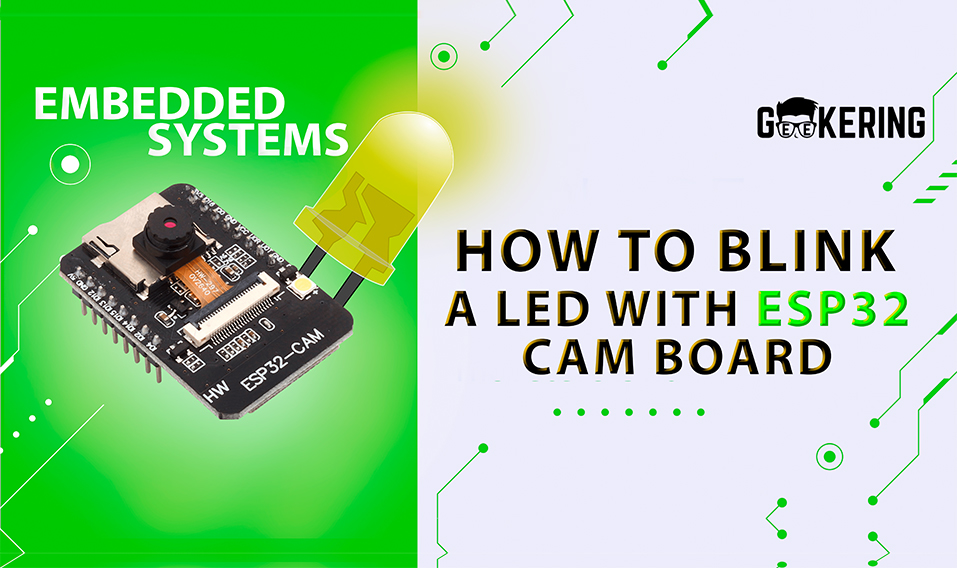
In this tutorial, I am going to show you how to blink a LED using the ESP32-CAM development board. With this module, you can develop WiFi/Bluetooth projects, that are capable of remote access to images. The ESP32-CAM is a development board with an ESP32-S chip, an OV2640 camera, several GPIOs to connect peripherals and a microSD card slot to save images while communication is not available.
For now, let’s start by knowing the basics.
Parts Required
- ESP32-CAM;
- FTDI Mini USB for TTL UART Serial Port Converter;
- Breadboard (optional);
- LED (optional);
- 330 ohm resistor (optional);
- Male to male jumper wires (optional);
The ESP32-CAM Board

ESP32-CAM module is starting to be widely used in applications that need image broadcasting, facial recognition, image processing and most importantly, built-in Wifi and Bluetooth. The ESP32 chip is so powerful that it can even process images. It also includes I2C, SPI, UART communications as well as PWM and DAC outputs.
Now lets talk about the general pinout of the board. You can follow the figure 2 as we progress.

GPIO 1 (TX) and GPIO 3 (RX) are serial pins. Because the board does not have a built-in programmer, you need to use these pins to communicate with an FTDI programmer and upload the code. You can use GPIO 1 and GPIO 3 to connect other peripherals. But remember, if you occupy them, you would not be able to open the Serial Monitor.
GPIO 0 determines whether the ESP32 is in flashing mode or not. When GPIO 0 is connected to GND, the ESP32 is in flashing mode.
GPIO 16 is by default a UART pin. However, you can use it as input. It is internally connected to a 10k Ohm pull-up resistor.
There are three GND pins (black color) and two power pins (red color): 3.3V and 5V. The board can be powered through the 3.3V or 5V pins. However, a lot of people recommend powering the board through the 5V pin. So, we will respect that.
Attention:
There is also the pin VCC (yellow color). You should not use that pin to power the board. That is an output power pin. It can either output 5V or 3.3V, whether it is powered with 5V or 3.3V.
These pins are internally connected to the microSD card reader:
- GPIO 14: CLK
- GPIO 15: CMD
- GPIO 2: Data 0
- GPIO 4: Data 1 (also connected to the on-board LED)
- GPIO 12: Data 2
- GPIO 13: Data 3
If the pins are not being used for microSD card, you can use these pins as regular inputs/outputs. All these GPIOs are RTC and support ADC: GPIOs 2, 4, 12, 13, 14, and 15.
GPIO 33 is an onboard LED, that is next to the RST button. That onboard LED works with inverted logic, so you send a LOW signal to turn it on and a HIGH signal to turn it off.
The camera connections between the camera and the ESP32-CAM AI-Thinker are shown in the image below.

Circuit

The board can be powered by any power supply available, like a battery or USB port on your computer. In this setup, it will be powered through a USB port via the FTDI power pins, like in figure 4. So start by connecting the FTDI GND to the Board GND and do the same with VCC. Connect the (Orange wire) FTDI TX to the Board RX and FTDI RX to the Board TX (White wire).
Note: the FTDI pins on the diagram may not match your FTDI. Make sure you check the silkscreen label.
Since, GPIO 0, determines whether the ESP32 is in flashing mode or not, we need to connect GPIO 0 to GND to turn the ESP32 is in flashing mode. After uploading the code, the GPIO 0 must be disconnected from the GND pin.
Programing Using FTDI
Our development board can be programmed using Arduino IDE, but for that, we need to use an FTDI. After completing the schematic above, we can connect the FTDI to the computer.
To upload code to the board, follow the next steps:
1 – Go to Tools > Board and select AI-Thinker ESP32-CAM. You must have the ESP32 add-on installed. Otherwise, this board won’t show up on the Boards menu. If you have not done the installation, there is a guide below on how to do it.
2 – Go to Tools > Port and select the COM port the board is connected to.
3 – For simplicity, you can upload a blank sketch to your board.
4 – When you start to see some dots on the debugging window, press the on-board RST button. After a few seconds, the code should be successfully uploaded to the board.

5 – When you see the “Done uploading” message, remember to remove GPIO 0 from GND and press the on-board Reset button to get the board ready.
Install the ESP32 Library and Add-on
To program the ESP32-CAM board with Arduino IDE, you need to have Arduino IDE installed as well as the ESP32 add-on.
Before starting, make sure you have the latest version of the Arduino IDE installed on your computer. You can get the latest version from arduino.cc/en/Main/Software.
Follow the next steps to install the ESP32 add-on and board on arduino IDE.
- In your Arduino IDE, go to File> Preferences

- Enter https://dl.espressif.com/dl/package_esp32_index.json into the “Additional Board Manager URLs” red field in the figure below. Then, click the “OK” button:

- Open the Boards Manager. Go to Tools > Board > Boards Manager

- Search for ESP32 and press install button for the “ESP32 by Espressif Systems“. It should be instaled after a few seconds.
After you make these steps, the ESP32-CAM board should be ready. Plug the ESP32 board into your computer. In your Arduino IDE open Tools > Board menu and select the board, like figure 10. In our case is AI-Thinker ESP32-CAM. Select the correct port and it is ready to program.

Coding
//LED BUILT_IN is GPIO 33
void setup() {
  pinMode(33, OUTPUT); // Set the pin as output
}

// Remember that the pin work with inverted logic
// LOW to Turn on and HIGH to turn off
void loop() {
  digitalWrite(33, LOW); //Turn on
  delay (1000); //Wait 1 sec
  digitalWrite(33, HIGH); //Turn off
  delay (1000); //Wait 1 sec
}
Bibliografy
- https://randomnerdtutorials.com/esp32-cam-ai-thinker-pinout/
- https://randomnerdtutorials.com/about/
- https://randomnerdtutorials.com/program-upload-code-esp32-cam/
- https://loboris.eu/ESP32/ESP32-CAM%20Product%20Specification.pdf
- https://www.espressif.com/sites/default/files/documentation/esp32_datasheet_en.pdf
WOW just what I was looking for. Came here by searching
for laser
You actually make it seem really easy with your presentation however I in finding this topic to be really something which I
feel I’d by no means understand. It seems too complicated and very vast for me.
I’m having a look ahead in your next post, I will attempt to get the hang of it!
Very good article. I am experiencing many of these issues as
well..
Cool blog! Is your theme custom made or did you download it
from somewhere? A theme like yours with a few simple adjustements would
really make my blog shine. Please let me know where you got your design. Many thanks
It’s impressive that you are getting ideas from this
article as well as from our dialogue made here.
Aw, this was a very nice post. Taking a few minutes and actual effort to generate a great article…
but what can I say… I procrastinate a whole lot and never manage to get
anything done.
I need to to thank you foor this fantastic read!! I definitely enjoyed every biit of it.I have got you book-marked too
look at new things youu post…
It’s yes nearly impossible to find well-informed people about
this topic, but you souand like you knosw what you’re talking about!
Thanks
Greetings! Very helpful advice within this article!
It is the little changes that produce the greatest changes.
Thanks a lot for sharing!
Wonderful post! We will be linking to this great article on our website.
Keep up the great writing.
Nice blog here! Also your web site a lot up very fast!
I desire my site loaded up as quickly as yours…
Hello! I wijsh to say that this post is awesome, great written and come
with approximately all important infos. I’d like to look extra posts like this!
🙂
It is not mmy first time to go tto seee this website, i am visiting this webb page dailly and take good information from here all the time.
It’s in point of fact a nice and helpful piece of information. I’m happy that you simply shared this useful info
with us. Please keep us up to date like this. Thank you for sharing.
I’ve learn some good stuff here. Definitely worth bookmarking for revisiting.
I wonder how much attempt you set to create any such magnificent informative web site.
We are a gaggle of volunteers and opening a brand new scheme
in our community. Your website offered us with helpful info
to work on. You’ve performed a formidable activity and our whole community will likely be thankful to you.
Informative article, exactly what I was looking for.
I’m impressed, I have to admit. Rarely do I come across a blog that’s both educative and engaging, and let me tell you, you have hit the nail on the
head. The issue is an issue that not enough people are speaking intelligently about.
Now i’m very happy that I found this in my hunt for something concerning
this.
Asking questions are in fact nice thing if you are not understanding something entirely, but this
paragraph presents nice understanding yet.
This post will assist the internet visitors for creating new
blog or even a blog from start to end.
Hello I am so glad I found your blog page, I really found you
by mistake, while I was researching on Yahoo for something else, Nonetheless I am here now and would just like to say thanks
a lot for a remarkable post and a all round enjoyable blog (I also love the
theme/design), I don’t have time to read through it all at the minute but I have saved it and also added your RSS
feeds, so when I have time I will be back
to read more, Please do keep up the awesome job.
Hello everyone, it’s my first visit at this website, and piece of writing iss genuinely fruitful
designed for me, keep up posting such articles or reviews.
This is the perfect web site for everyone who wishes to
understand this topic. You realize so much its almost hard
to argue with you (not that I actually will need to…HaHa).
You certainly put a fresh spin on a topic that has been written about for
years. Excellent stuff, just great!
Heya i’m for the first time here. I found this board and I find It
really useful & it helped me out a lot. I hope to give something back and help others like you aided me.
bookmarked!!, I really like your website!
If you would like to increase your know-how only keep visiting this web page and be updated with the newest news update posted
here.
Appreciate the recommendation. Will try it out.
Wow, amjazing blog layout! How lonng hhave you been blogging for?
you made bloggin look easy. The overall look of your web
site is excellent,as well as the content.
Very nice post. I ust stumbled upon yoyr blog
and wanted to say that I’ve truly enjoyed surfing around your blog posts.
In any case I will be subscribing to your feed and I hope you write again very soon!
What’s up, this weekend is pleasant in favor of me, as this time i am reading this great educational post here at my residence.
Hello to every one, since I am genuinely keen of reading this website’s poet to
be updated regularly. It carries nice data.
Very good post! We will be linking to this great article on our site.
Keep up the good writing.
Keep working ,impressive job!
Greetings! Very useful advice within this post!
It’s the little changes that will make the most important changes.
Thanks for sharing!
each time i used to read smaller articles that as well clear their motive, and
that is also happening with this article which I am reading here.
I know this website presents quality based articles or reviews
and other stuff, is there any other web page which provides these kinds
of data in quality?
I discovered your blog site on google and check a few of your early posts. Continue to keep up the very good operate. I just additional up your RSS feed to my MSN News Reader. Seeking forward to reading more from you later on!?
It’s remarkable in support of me to have a web page,
which is beneficial designed for my know-how.
thanks admin